23rd Oct 2026
not been able to work. Paint, scale, poor metal-to-metal contact, a broken bonding path, the wrong alloy, passivation or lack of immersion can leave an anode pristine while the propeller, shaft, drive or hull fitting corrodes instead.
Do not judge protection by the anode alone. Examine the protected metal, confirm the exact alloy and application, inspect every contact surface and electrical path, and compare the result with previous seasons. A correctly working anode normally shows some progressive surface change or loss, although the amount varies widely.
This guide explains how to distinguish low wear from failed protection. For a broader overview of alloy selection and placement, read The Ultimate Boat Anode Guide.
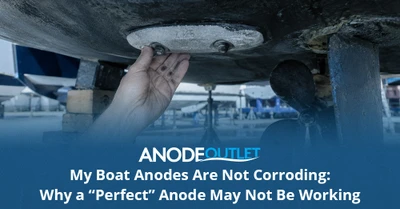
A shiny anode is not a performance test
If the protected metal is pitting while the anode remains intact, assume the system is ineffective until proven otherwise. Replace damaged components as necessary and investigate continuity, alloy and installation before the boat returns to the water.
Contents
- Key facts at a glance
- Could low anode wear be normal?
- Eight reasons an anode can remain untouched
- Check paint, mating faces and fixings
- What is anode passivation?
- Is the anode actually in the water?
- Check whether the anode is electrically connected
- A practical no-wear diagnostic sequence
- Signs that the boat is under-protected
- Frequently asked questions
- Technical references
Key facts at a glance
- Sacrificial anodes need both electrical contact with the protected metal and exposure to the same water.
- Paint, antifouling, sealant, heavy oxide, grease or corrosion between mating faces can electrically isolate an anode.
- Zinc and some aluminium anodes can form passive surface films in unsuitable water conditions.
- An anode may look clean after pressure washing even though it had been active; inspect and photograph it before aggressive cleaning.
- Anodes fitted above the water at the normal berth cannot protect submerged metal through air.
- A component isolated by a flexible coupling or broken bonding strap may not be connected to the intended hull anode.
- Low wear can be legitimate on a well-coated, lightly loaded system, but it should be supported by healthy protected metal and appropriate in-water potential readings.
- Colour and shape alone do not identify zinc, aluminium or magnesium reliably.
- Never sand or wire-brush an anode merely to make it look active without finding the cause of passivation.
- The equipment manufacturer’s part number, alloy and fitting method take priority over a visually similar replacement.
Replace an inactive or incorrect anode
Choose the approved alloy and exact component fit rather than selecting by appearance alone.
Could low anode wear be normal?
Yes. An anode is a current source, and a well-coated metal component with little exposed area may require only a small protective current. A boat stored ashore for much of the year, used in low-conductivity water or fitted with a generously sized anode can show modest loss. That is not automatically a fault.
The test is whether the whole system tells a consistent story. Healthy coatings, no pitting or dezincification, verified continuity, correct alloy and stable reference-electrode readings support the conclusion that demand is low. A perfect anode beside a corroding propeller or blistering drive does not.
| Observation | More reassuring interpretation | Concerning interpretation |
|---|---|---|
| Minor, even surface roughening with little mass loss | Low but real current demand | Early passivation if the surface is becoming glazed or heavily coated |
| Anode unchanged and protected metal pristine | Possible low demand | Still requires alloy and continuity confirmation if previous anodes wore normally |
| Anode unchanged but nearby metal is pitted | None | Anode is isolated, inactive, underspecified or not protecting that component |
| One anode wears and an identical one does not | Different local loading may explain it | Poor contact, partial immersion or broken connection at the inactive unit |
| Hull anodes show little loss but drive anodes wear | Separate systems may be operating normally | Do not assume the hull anodes protect a drive unless designed and bonded to do so |
Eight reasons an anode can remain untouched
| Cause | How it stops protection | Typical evidence |
|---|---|---|
| 1. Painted or coated anode | The coating prevents ionic current passing between anode and water. | Antifouling, primer or propeller coating on the sacrificial surface. |
| 2. Insulated mating face | Paint, sealant, oxide or grease blocks metal-to-metal contact. | Clean-looking outer face but coated back, insert or bolt interface. |
| 3. Wrong alloy for the water | A passive film forms or the driving voltage is unsuitable. | Zinc in fresh/weakly brackish water, or a non-approved alloy for the equipment. |
| 4. Broken bonding path | The component and anode are not electrically connected. | Failed continuity strap, loose connector, corroded wire or unbridged flexible coupling. |
| 5. Anode is not immersed | No electrolyte links the anode to the underwater component. | Drive tilted clear of the water or hull anode above the loaded waterline. |
| 6. Wrong part or poor fit | The insert or contact surfaces do not engage as designed. | Visible gaps, rocking, bottomed-out bolt or mismatched centre hole. |
| 7. The anode protects a different component | Proximity alone does not create an electrical circuit. | Hull anode near a propeller but no bonding connection to the shaft system. |
| 8. Inactive or contaminated material | Poor alloy quality or a stubborn passive layer limits current output. | Unknown product provenance, glassy surface or contradictory performance. |
Check paint, mating faces and fixings
Anodes must be bare to the water and electrically connected at the installation surfaces designed by the manufacturer. That does not mean grinding every surrounding painted component to bare metal. Drives and aluminium structures usually rely on carefully controlled coating systems, and unnecessary exposed metal increases anode demand.
- Photograph before removal. Record position, orientation, gaps and coating around the anode.
- Remove the anode safely. Follow the equipment manual and support the drive or component as required.
- Inspect both contact faces. Look for paint, sealant, calcium deposits, corrosion scale and distorted inserts.
- Clean only the intended contact area. Do not enlarge bare areas or damage factory coatings.
- Check the bolt and insert. A tight fastener is not proof of electrical contact if it bottoms in the hole or clamps against an insulated layer.
- Fit the exact replacement. Use specified washers, fasteners, thread treatment and torque. Keep threadlocker away from required conductive interfaces unless the manual states otherwise.
- Test the conductive path. A continuity check can identify an open circuit, but in-water potential testing may still be required.
Purpose-made anode bolts and fittings help preserve the intended mechanical and electrical connection. Reusing heavily corroded, stretched or incorrect hardware can undermine a new anode.
What is anode passivation?
Passivation is the formation of a surface film that restricts the electrochemical reaction. Instead of continuing to dissolve, the anode becomes relatively inactive. The risk depends on alloy composition, water chemistry, current density and temperature. This is why water-type recommendations are more precise than the old habit of calling every sacrificial anode a “zinc”.
Zinc anodes can be appropriate in salt water but may passivate in fresh or weakly brackish water. Aluminium anodes are widely specified for salt and brackish water and can remain active over a broader range when the alloy is correctly manufactured. Magnesium anodes provide higher driving voltage for low-conductivity fresh water but are generally unsuitable for salt or brackish water because they can waste rapidly and overprotect.
Do not use service life as the only selection criterion
The “best” anode is not the one that lasts longest. It is the approved alloy that holds the protected metal within the correct potential range. An inactive anode can last for years while providing little useful protection.
Is the anode actually in the water?
A drive anode works only while immersed. Outboards and sterndrives left fully tilted at a mooring may have anodes clear of the water while other drive components remain wet or periodically immersed. A hull anode fitted near the static waterline may emerge when tanks are empty or the boat sits differently at the berth.
Inspect the boat in its normal loaded condition. Check tidal range, heel, trim and whether air pockets or marine growth shield the anode. Hanging anodes are similarly dependent on immersion and a sound cable connection; they must not simply be dropped beside the boat without being electrically connected to the intended bonding point. Browse purpose-designed hanging anodes where temporary supplementary protection is appropriate.
Check whether the anode is electrically connected
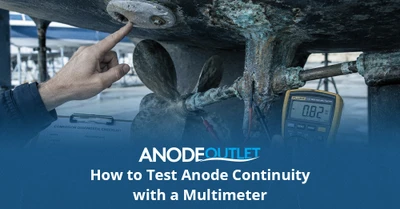
A multimeter continuity or low-resistance test can reveal an open connection between an anode mounting point and the component it is intended to protect. Isolate electrical systems as required by the equipment procedure, use clean probe points and compare readings with a known direct metal connection. Flexible couplings, rubber mounts and painted joints are common breaks in the intended path.
Do not turn one generic resistance figure into a universal pass/fail rule. Lead resistance, probe contact, circuit design and connected equipment affect the reading. The aim is a stable, very low-resistance path consistent with the manufacturer’s design. A dedicated guide later in this pack explains the method in detail.
For shaft systems, the existing shaft-anode fitting guide explains direct-fit options, while an electro-eliminator or bonding arrangement may be used in some installations to maintain connection across the shaft system. The correct approach depends on the boat’s design.
A practical no-wear diagnostic sequence
| Step | Question | Action |
|---|---|---|
| 1 | Is the protected metal healthy? | Inspect for pitting, pinking, coating loss and corrosion products before cleaning. |
| 2 | Is this the exact approved anode? | Verify part number, dimensions, alloy, equipment model and water type. |
| 3 | Has it been immersed? | Check real waterline and drive position at the berth. |
| 4 | Is the surface bare? | Remove paint or deposits only as instructed; never coat the sacrificial face. |
| 5 | Are contact faces conductive? | Remove and inspect the back, insert, fasteners and mating surface. |
| 6 | Is the protected component connected? | Test continuity and inspect straps, wires and couplings. |
| 7 | Is demand genuinely low? | Compare previous seasons and obtain in-water potential readings if uncertainty remains. |
| 8 | Does the system need redesign? | Ask a corrosion specialist if components, bonding or alloy have changed. |
Never “activate” an anode by drilling holes, reducing its size or adding random bonding wires. Those changes alter the designed system without proving the cause.
Signs that the boat is under-protected
- Pitting on aluminium drives, trim tabs, shafts, rudders or hull plating.
- Pink, porous or crumbly areas on bronze or brass components, indicating possible dezincification.
- White corrosion products, flaking paint or bubbling around underwater metals.
- Rapid attack on fasteners, split pins or small fittings while the anode remains sound.
- An abrupt change after fitting a flexible coupling, repainting a drive or replacing a propeller.
- Different potentials or corrosion patterns across components that should be one connected system.
- Anodes remain pristine in water where identical products previously showed normal wear.
If these signs are present, replace any incorrect or isolated anode but do not stop there. The protected component may require repair and the system should be assessed in the water. The background article on cathodic protection for boats explains the underlying electrical circuit.
Find the correct component anode
Browse engine, drive, hull, propeller and shaft anodes by application rather than choosing a visually similar piece.
Frequently asked questions
Should a sacrificial anode always show corrosion?
A working anode normally shows some surface change over time, but the rate can be very low on a well-coated, lightly loaded system. Confirm the protected metal, contact, alloy and in-water performance before deciding that no wear is acceptable.
Can I clean a white crust off a zinc anode?
Light cleaning may expose the surface for inspection, but a recurring passive film indicates that the alloy or water conditions need investigation. Do not treat abrasive cleaning as a substitute for correct selection.
Why is my shaft anode not wearing?
It may lack close, clean contact with the shaft, be the wrong diameter, be electrically isolated by contamination or simply have low demand. Inspect the propeller and shaft as well as the anode.
Does a continuity beep prove the anode works?
No. It indicates that the meter detects an electrical path, but it does not prove correct anode output or protection potential in the water. Use it as one diagnostic step.
Can antifouling touch an anode?
Follow the drive or anode manufacturer’s clearance instructions. The anode itself must remain unpainted, and copper-containing coatings can be particularly damaging around aluminium drives.
Should I replace an anode that looks new?
Replace it if it is the wrong alloy, poorly fitted, contaminated, cracked or of unknown quality. If it is correct and healthy, establish why it has not worn before discarding it automatically.
Technical references
Always use the current manual for the exact engine, drive, propeller or cathodic-protection system.